Office 365 Message Encryption (OME) leverages Azure Rights Management (Azure RMS). OME lets you send encrypted email to recipients, be it either inside or outside the organization. It even works regardless of the destination email address (Gmail, Yahoo! Mail, Outlook.com, etc.). Now another cool feature is that you can adjust the format and layout of how these protected emails are sent out towards the receiving party.
Connecting to Exchange Online
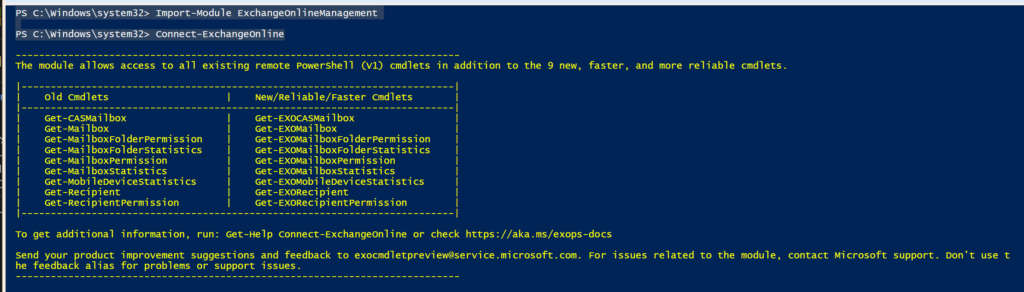
First start out with whipping up an Elevated PowerShell prompt.
Next enter the following commands to Import the ExchangeOnline Management module.
PS C:\Windows\system32> Import-Module ExchangeOnlineManagement
PS C:\Windows\system32> Connect-ExchangeOnline
OME Template information
Now we can start configuring a new template. We can adjust the following parts of the template:
- Introductory text
- Disclaimer text
- URL for Your organization’s privacy statement
- Text in the OME portal
- Logo that appears in the email message and OME portal, or whether to use a logo at all
- Background color in the email message and OME portal
It is also good to know that you can have several templates. However please note that you can EDIT the DEFAULT template, but you can NEVER DELETE the default template.
Using templates is useful in several situations. For example if you are trying to configure for:
- Individual departments, such as Finance, Sales, and so on.
- Different products
- Different geographical regions or countries
- Whether you want to allow emails to be revoked
- Whether you want emails sent to external recipients to expire after a specified number of days.
OME Template PowerShell Commands
To start creating templates, the following commands are usefull to know:
- Set-OMEConfiguration – Modify the default branding template or a custom branding template that you created.
- New-OMEConfiguration – Create a new branding template, Advanced Message Encryption only.
- Remove-OMEConfiguration – Remove a custom branding template, Advanced Message Encryption only. You can’t delete the default branding template.
The following table of commands has been derived from the Microsoft Technet article found over here:
These will give you a good general understanding of the command buildup and how you should use each setting.
| To customize this feature of the encryption experience | Use these commands |
| Background color | Set-OMEConfiguration -Identity “<OMEConfigurationName>” -BackgroundColor “<#RRGGBB hexadecimal color code or name value>” Example: Set-OMEConfiguration -Identity “Branding Template 1” -BackgroundColor “#ffffff” |
| Logo | Set-OMEConfiguration -Identity “<OMEConfigurationName>” -Image <Byte[]> Example: Set-OMEConfiguration -Identity “Branding Template 1” -Image ([System.IO.File]::ReadAllBytes(‘C:\Temp\contosologo.png’)) Supported file formats: .png, .jpg, .bmp, or .tiff Optimal size of logo file: less than 40 KB Optimal size of logo image: 170×70 pixels. If your image exceeds these dimensions, the service resizes your logo for display in the portal. The service doesn’t modify the graphic file itself. For best results, use the optimal size. |
| Text next to the sender’s name and email address | Set-OMEConfiguration -Identity “<OMEConfigurationName>” -IntroductionText “<String up to 1024 characters>” Example: Set-OMEConfiguration -Identity “Branding Template 1” -IntroductionText “has sent you a secure message.” |
| Text that appears on the “Read Message” button | Set-OMEConfiguration -Identity “<OMEConfigurationName>” -ReadButtonText “<String up to 1024 characters>” Example: Set-OMEConfiguration -Identity “OME Configuration” -ReadButtonText “Read Secure Message.” |
| Text that appears below the “Read Message” button | Set-OMEConfiguration -Identity “<OMEConfigurationName>” -EmailText “<String up to 1024 characters>” Example: Set-OMEConfiguration -Identity “OME Configuration” -EmailText “Encrypted message from ContosoPharma secure messaging system.” |
| URL for the Privacy Statement link | Set-OMEConfiguration -Identity “<OMEConfigurationName>” -PrivacyStatementURL “<URL>” Example: Set-OMEConfiguration -Identity “Branding Template 1” -PrivacyStatementURL “https://contoso.com/privacystatement.html“ |
| Disclaimer statement in the email that contains the encrypted message | Set-OMEConfiguration -Identity “<OMEConfigurationName>” -DisclaimerText “<Disclaimer statement. String of up to 1024 characters.>” Example: Set-OMEConfiguration -Identity “Branding Template 1” -DisclaimerText “This message is confidential for the use of the addressee only.” |
| Text that appears at the top of the encrypted mail viewing portal | Set-OMEConfiguration -Identity “<OMEConfigurationName>” -PortalText “<Text for your portal. String of up to 128 characters.>” Example: Set-OMEConfiguration -Identity “OME Configuration” -PortalText “ContosoPharma secure email portal.” |
| To enable or disable authentication with a one-time pass code for this custom template | Set-OMEConfiguration -Identity “<OMEConfigurationName>” -OTPEnabled <$true|$false> Examples: To enable one-time passcodes for this custom template Set-OMEConfiguration -Identity “Branding Template 1” -OTPEnabled $true To disable one-time passcodes for this custom template Set-OMEConfiguration -Identity “Branding Template 1” -OTPEnabled $false |
| To enable or disable authentication with Microsoft, Google, or Yahoo identities for this custom template | Set-OMEConfiguration -Identity “<OMEConfigurationName>” -SocialIdSignIn <$true|$false> Examples: To enable social IDs for this custom template Set-OMEConfiguration -Identity “Branding Template 1” -SocialIdSignIn $true To disable social IDs for this custom template Set-OMEConfiguration -Identity “Branding Template 1” -SocialIdSignIn $false |
Creating and OME Template
Now let’s setup an example. Please execute the following command:
New-OMEConfiguration -Identity “Custom branding template Maas Consultancy”
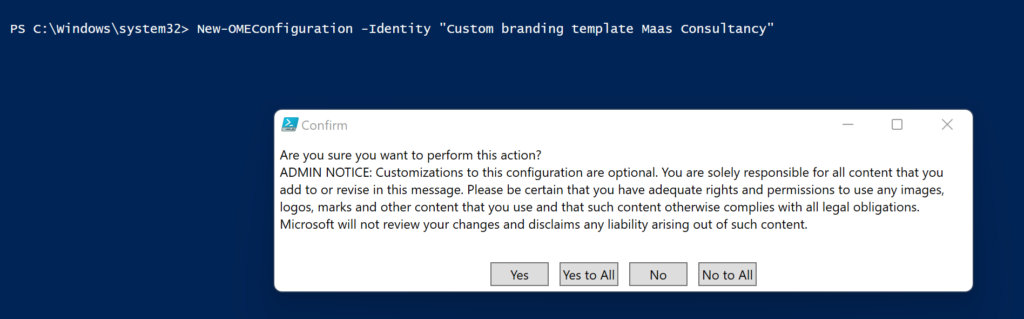
Using this command we will create a new template.
Click yes to all.
Once completed we can actually see that the creation is successful.
Now we need to setup a color for the backgorund. We are chosing orange in this case. For this we can use the name or the color code to add the backgorund color.
Example:
darkorange #ff8c00
For an overview of the available colors, please have a look at:
Now use the Set-OMEConfiguration command to set the background.
Set-OMEConfiguration -Identity “Custom branding template Maas Consultancy” -BackgroundColor “#ff8c00”
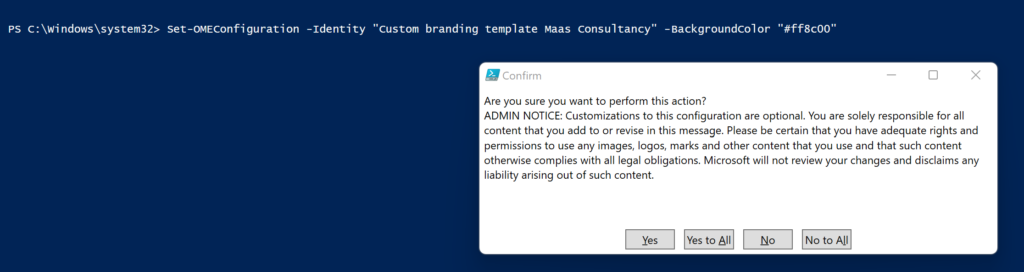
Again click Yes to All.
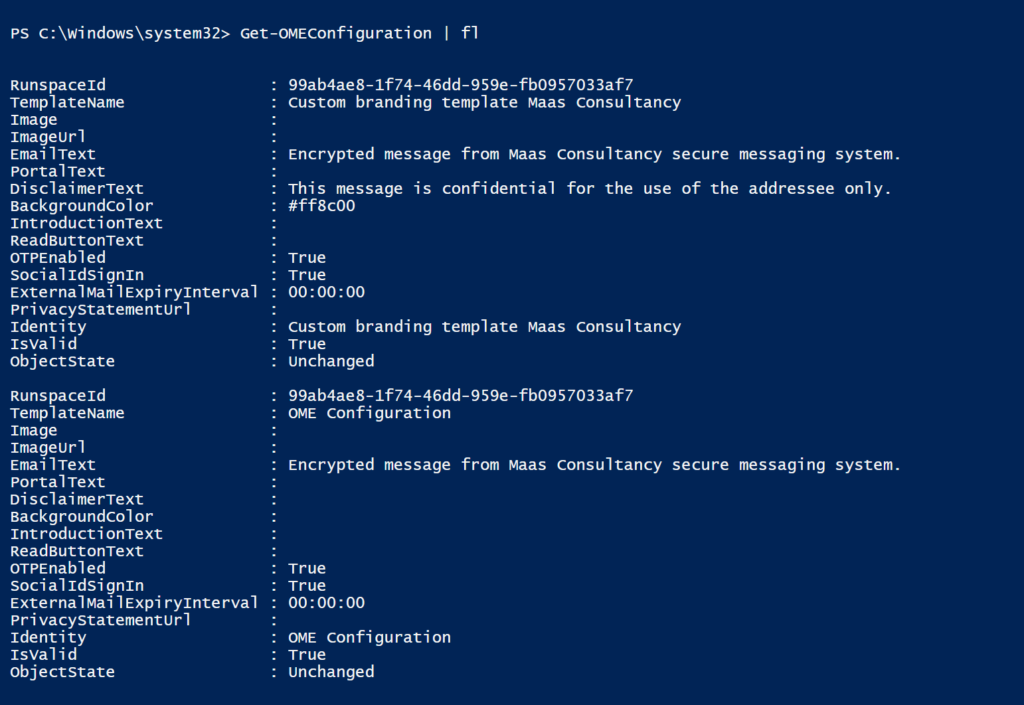
Now we are going to adjust the text that is shown in the Email body and the disclaimer:
Set-OMEConfiguration -Identity “Custom branding template Maas Consultancy” -EmailText “Encrypted message from Maas Consultancy secure messaging system.”
Set-OMEConfiguration -Identity “Custom branding template Maas Consultancy” -DisclaimerText “This message is confidential for the use of the addressee only.”
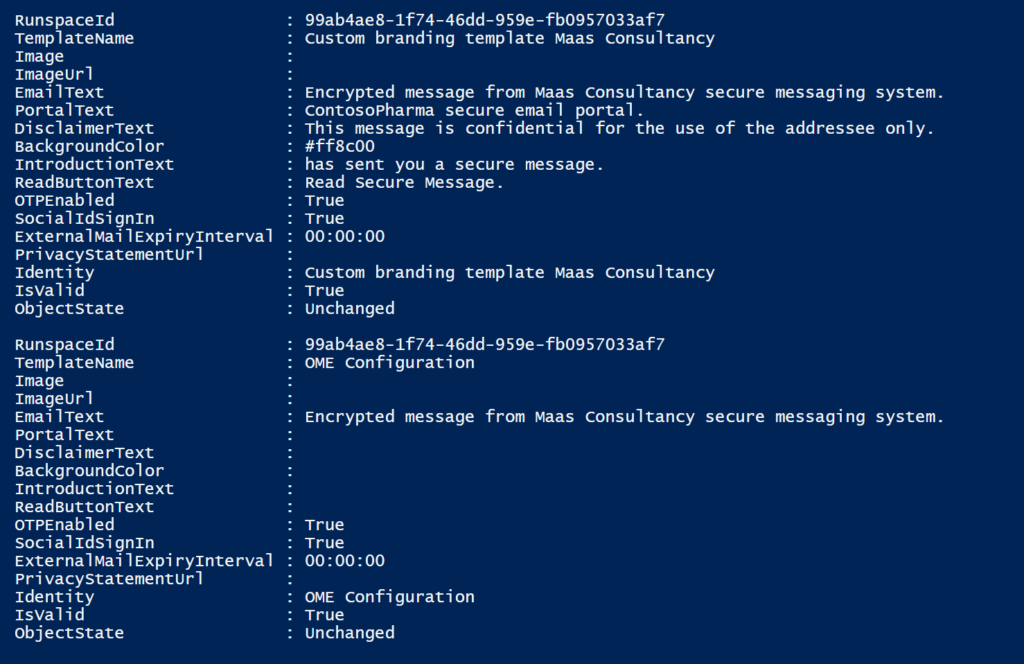
Once done, use the Get-OMEConfiguration with the FL pipe to view the full configuration of all the templates and their associated settings.
Get-OMEConfiguration | FL
Now we would like to finetune the different kinds of text some more. Below are some examples of these customizations:
- Set-OMEConfiguration -Identity “Custom branding template Maas Consultancy” -IntroductionText “has sent you a secure message.”
- Set-OMEConfiguration -Identity “Custom branding template Maas Consultancy” -ReadButtonText “Read Secure Message.”
- Set-OMEConfiguration -Identity “Custom branding template Maas Consultancy” -PortalText “ContosoPharma secure email portal.”
As of this point, the template has been fully configured to out liking. The final thing we need to do is create a mailflow rule to apply the template on our emails.
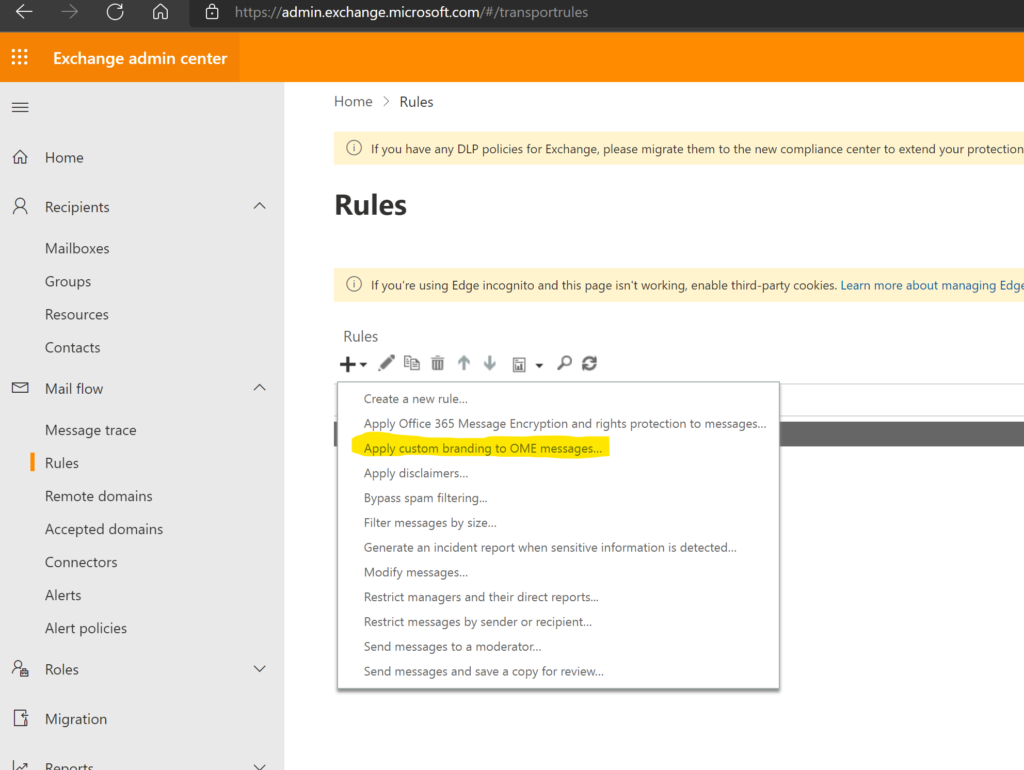
Exchange Online Admin center
Go to the Exchange Online Admin Center and head over to the rules section.
In here click the plus sign and select “Apply custom branding to OME Messages…”
In the new rule define your parameters on which you would like to apply the template to be active.
Some examples of mails you would want to protect could be:
- All encrypted emails sent from members of the finance department
- Encrypted emails sent with a certain keyword such as “External” or “Partner”
- Encrypted emails sent to a particular domain
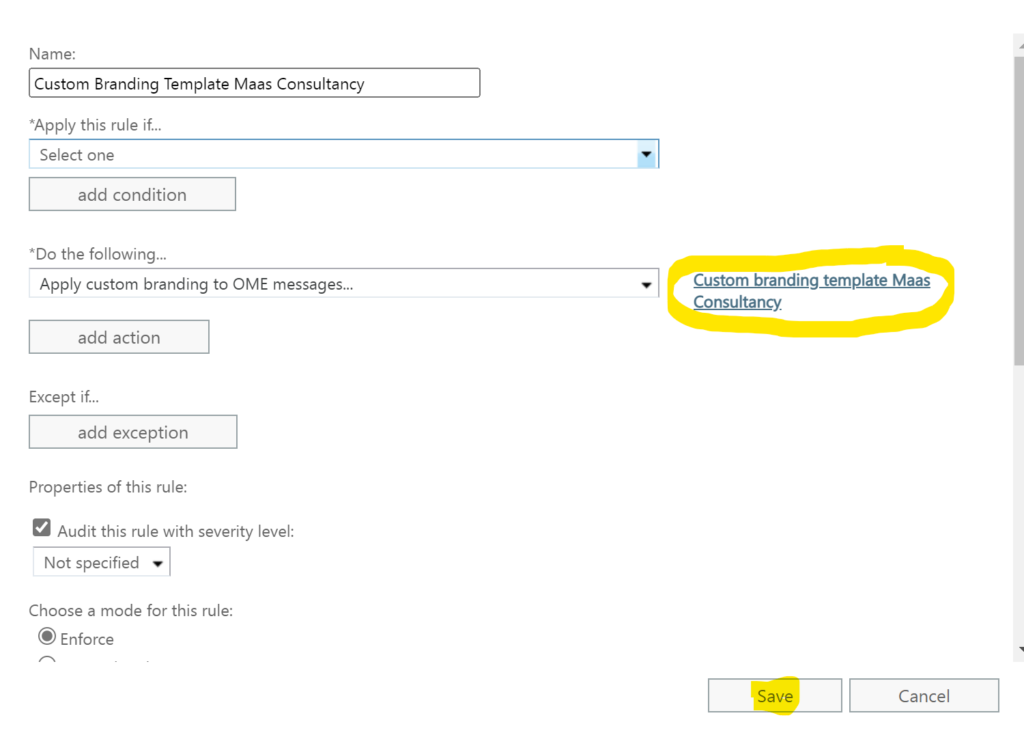
Once this is configured to your liking, select Do the following > Apply custom branding to OME messages.
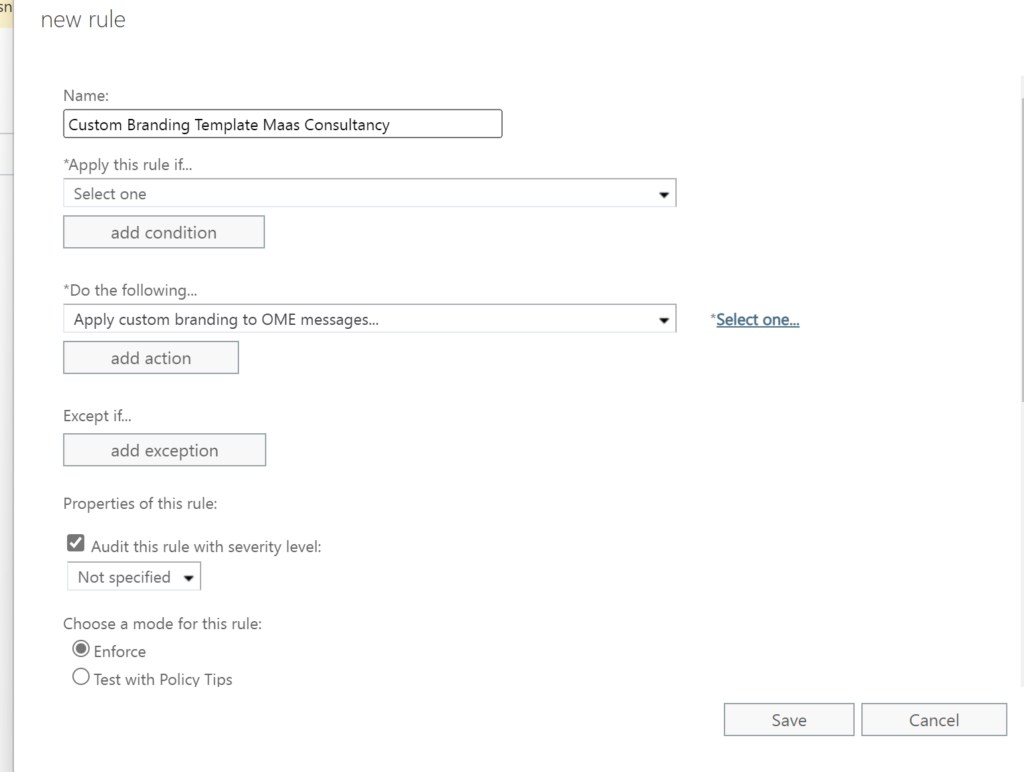
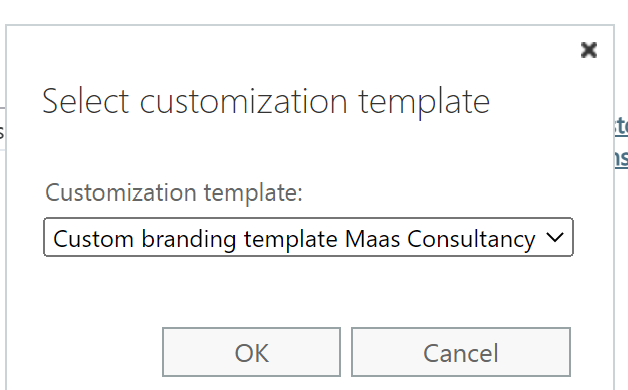
Click the “select one” option next to do the following, and select the template we just created.
Now if you want to encrypt emails you might also want to add another action and select “Apply Office 365 Message Encryption and rights protection to the message with….” and elect Encrypt.

Click Save and the rule will start to take effect. This can take up several minutes before this to be in effect.