During my work with Purview @Toreon, I come across a lot of different situations. Several of these scenarios include labeling items in bulk on SharePoint or labeling items in hindsight. Sometimes I even come in contact with organizations that have already implemented labels and classifications, but for some reason need to change their old labels to new ones. This led me to search for an efficient way, as the Purview portal does not always allow for this. Although it does have auto-label policies, these do not allow for more advanced scenarios like relabeling items in bulk to a new label. Hence, I have created a script that allows for relabeling documents in SharePoint. However, to be honest, I would have to say it is more of an adaptation of a script that was already created by Tony Redmond, an author on Practical365. So, the original base and credits go to him. I am just providing some guidance on getting the label script working (because I had some issues getting it started), as well as how I changed the script to allow relabeling as well.
As mentioned, I based my script on Tony Redmond’s work (original blog post here: https://practical365.com/assignsensitivitylabel-api/).
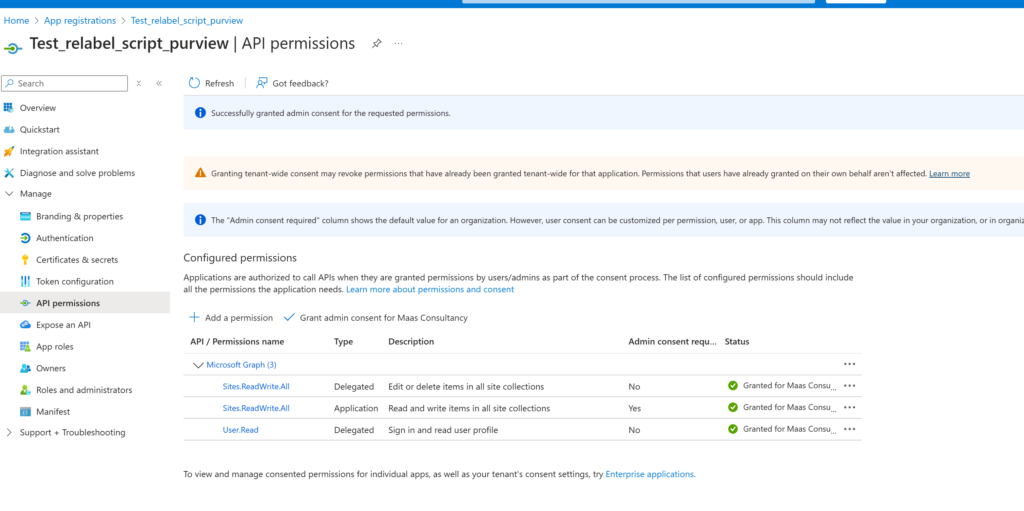
I had several issues getting it to work, especially with the Microsoft.Graph module, where I was getting errors left and right when trying to run the original script. However, eventually, I managed to get everything working. To get this working, one of the first things I needed to do was create an app registration in Entra ID. Now, this blog post is not about how to create an app registration, but the key thing to note is that your app must have at least the Sites.ReadWrite.All application permissions. Please note that an administrator needs to give consent for these permissions. Without consent, the permissions will not work. Also, if your organization has separation of duties or has limited highly privileged user permissions, then you should get those users onboard as well while preparing your application permissions.
In addition, you would need to create a X.509 certificate in order to secure the connection. Personally I have used this script several times to create a certificate that is suitable for this: https://gist.github.com/rithala/bc612b3a405a52aeef68e29f8de1f832. This creates a self-signed certificate. However, feel free to use any other script or certificate you like.
Once you have this enabled/setup, I have followed the guidance of Tony Redmond’s post on creating and assigning the link the app registration with an Azure subscription. The link allows Microsoft to charge for any calls the app makes to the metered API. Please note that the calls we are about to make in the script are part of metered API’s. This basically means, each file you are going to relabel, or label will cost you.
Enable metered APIs and services in Microsoft Graph – Microsoft Graph | Microsoft Learn
To achieve this i used the following command (for obvious reasons I have changed the ID’s). But you can retrieve the subscript ID and App ID from your tenant and the app you created earlier. Enter this in the Azure cloud shell.
az graph-services account create –resource-group SensitivityLabels –resource-name myGraphAppBilling –subscription e64592a2-963c-412b-91F7-9e77342df3d9 –location global –app-id 4654ad3e-d6d3-487d-8ba5-2bd3d4343d3f
The output should look somewhat similar to the one below:

As a next step, you will need to connect to Exchange Online and the Information Protection Service to retrieve the label ImmutableId’s, as we will need these later on in the script.
The following script can help you with this. However, don’t forget that you should install the necessary PowerShell modules:
Exchange Online PowerShell V2
Connect-ExchangeOnline
Connect-IPPSSession
[array]$Labels = Get-Label | Where-Object {$_.ContentType -like "*File*"}
$Labels | Format-Table ImmutableId, DisplayName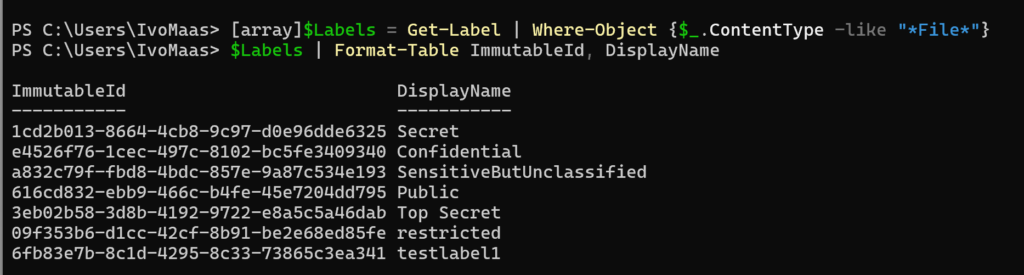
Next, create a Notepad/PS1 script containing the following commands:
$appid = "4654ad3e-d6d3-487d-8ba5-2bd3d4343d3f"
$tenantid = "a2d7efc3-145b-4c75-ac17-c31ed82ed8c3"
$CertThumbprint = "42DF3F59E85DBB84E5398882706CE43C03D7F938"
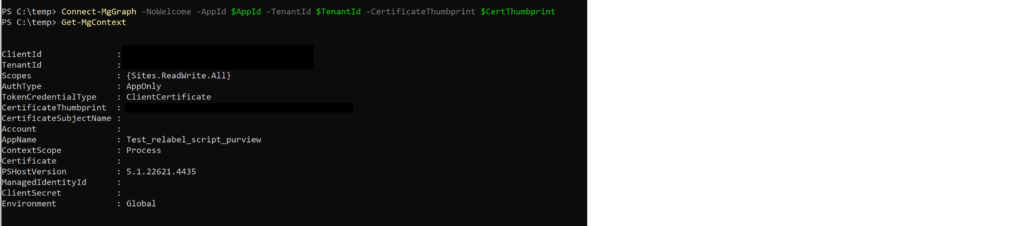
Connect-MgGraph -NoWelcome -AppId $AppId -TenantId $TenantId -CertificateThumbprint $CertThumbprint
However, before we can use the Connect-MgGraph command, we need to install the Microsoft Graph module.
Open up a PowerShell command prompt as an administrator. Personally, I had some issues in ISE, so I recommend using the regular PowerShell instead of ISE.
Run the command: Install-Module Microsoft.Graph -AllowClobber.
Now, we are ready to connect and validate whether we can establish a connection to the Graph API.
Run the command Connect-MgGraph -NoWelcome -AppId $AppId -TenantId $TenantId -CertificateThumbprint $CertThumbprint.
Afterwards run the command get-mgcontext. This will allow you to see things like the scope, authentication method, appname etc.
Now that we can setup a connection, we are ready to run out script.
You can download the script from my GitHub here:
https://github.com/IvoMaas/Purview/blob/main/Files/apply-sensitivitylabels.ps1
Or you can always visit the original site:
https://github.com/12Knocksinna/Office365itpros/blob/master/Apply-SensitivityLabels.PS1
Additionally, I recommend creating a SharePoint site in order to test and validate the script. I have prepared a SharePoint site called “test” and created several Word documents there, with no labels on them.
Now, let’s go into the script. I am using Notepad++ as an editor, but feel free to use any method you prefer. In the script, scroll down until you reach the section where we need to update the connection settings and the ImmutableId of the label we want to apply. Update it accordingly. Your script should look somewhat similar to the output below:

Fill out your app ID, TenantID, CertThumbprint and label ID + name.
Once that is done, navigate to the location of your script in powershell and use the command
./apply-sensitivitylabel.ps1 -site ‘test’
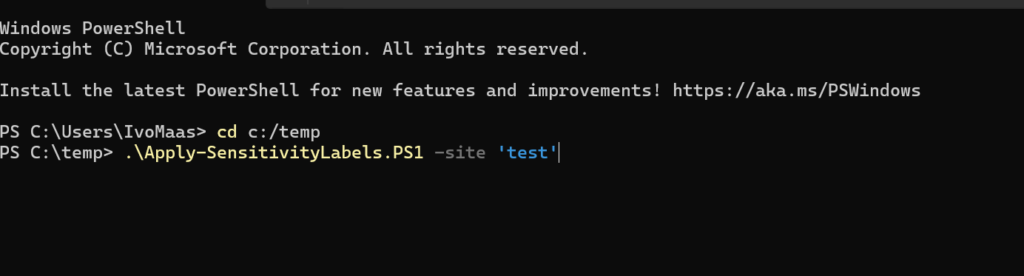
Of course, use the name of the script and site name of your SharePoint site as you have configured it. If the scripts finds multiple sites, with the same name, a menu appears. Select the correct site.

If you are getting an error at this point (I had one with get-mgsite, which was throwing an error), try an uninstall of the microsoft.graph module and install an older version. Sometimes this help to resolve unknown issues.
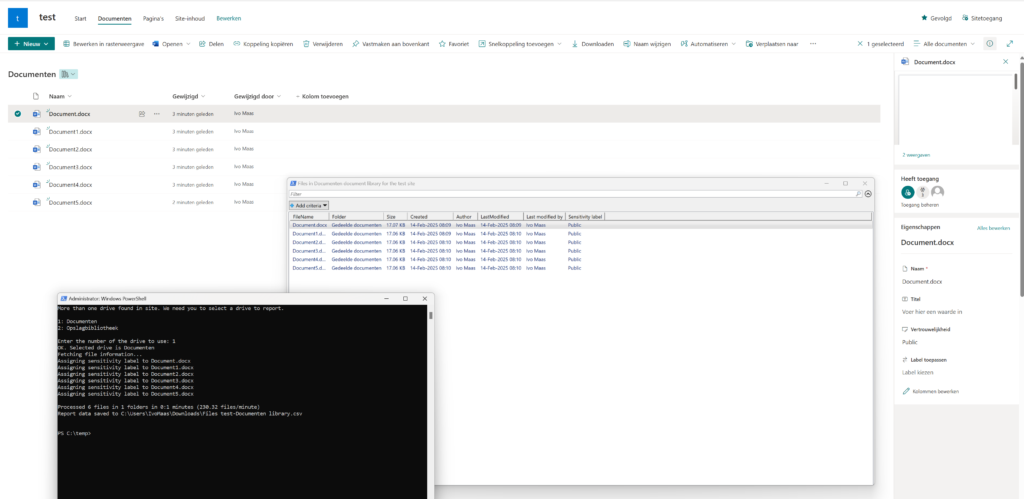
Once you have selected the correct site, the script will start to retrieve the file information and label your files. A report out is shown, as well as a .CSV file.
In addition, I have made a small modification to the original script. By doing this, it allows to relabel, previously labelled items.
This script can be found here:
https://github.com/IvoMaas/Purview/blob/main/Files/Relabel-script.ps1
The script works in a similar way, however now you need to enter an old label ID and a new label ID.

Once done, run the script and it will automatically start relabeling your items. Please be aware that it syncs an asynchronous way. So, it might take a while for the correct labels to appear. Again, I suggest testing this out first on some test files, before you run this into production.